24-Hour Vampire Bite Cheesecake That Haunts Taste Buds
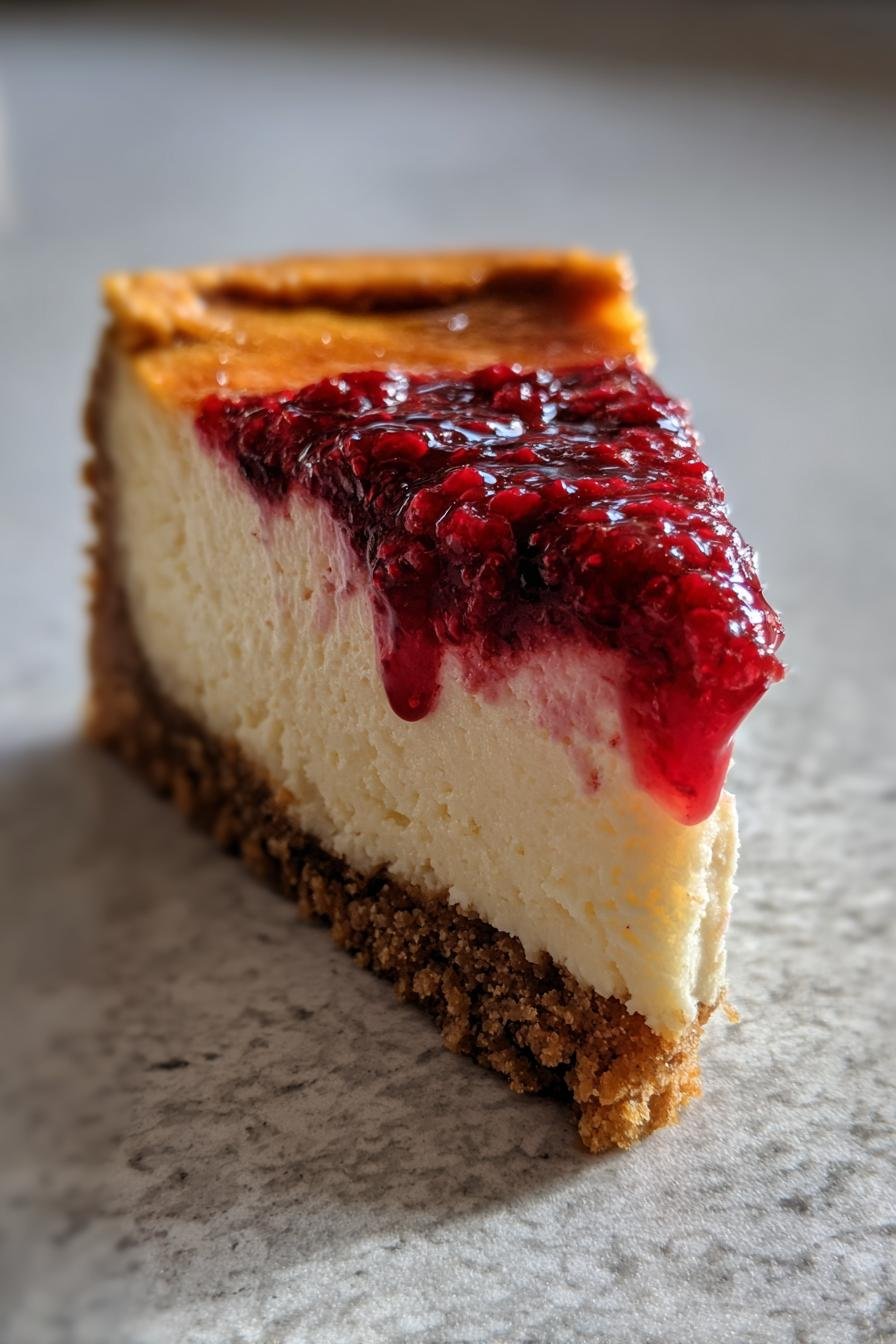
Halloween desserts are my absolute favorite to make – they’re the perfect excuse to get creative and a little spooky in the kitchen. This vampire bite cheesecake has been my go-to party showstopper for years, and trust me, it’s always a hit. I first made it for a Halloween potluck, and the oohs and aahs when I unveiled it were priceless. The creamy cheesecake with its eerie red swirls and “blood” drizzle looks just like a vampire took a bite – but don’t worry, it’s 100% delicious. With over a decade of baking cheesecakes, I’ve perfected this recipe to be both spooky and foolproof. Whether you’re hosting a monster mash or just want to impress your family, this vampire bite cheesecake is the ultimate Halloween treat.
Ingredients for Vampire Bite Cheesecake
Gathering the right ingredients is half the battle when making this spooky dessert – and I’ve learned through trial and error that quality and prep matter. Here’s what you’ll need to create the perfect vampire bite cheesecake:
- 2 cups graham cracker crumbs (packed firmly – I crush mine fresh in a bag with a rolling pin for maximum flavor)
- 1/2 cup melted butter (salted works best here for that sweet-salty crust we all love)
- 24 oz cream cheese (softened at room temperature for at least 2 hours – no shortcuts here!)
- 1 cup granulated sugar (I sometimes use superfine sugar for an extra smooth filling)
- 1 tsp pure vanilla extract (the good stuff makes all the difference)
- 3 large eggs (room temperature – cold eggs can make your filling lumpy)
- 1/2 cup sour cream (full-fat gives the creamiest texture)
- Red gel food coloring (gel works better than liquid for vibrant swirls)
- 1/2 cup seedless strawberry or raspberry jam (for that realistic “blood” effect)
Pro tip: Set everything out about 2 hours before baking – room temperature ingredients blend smoother and help prevent cracks in your finished cheesecake. Trust me, your future self will thank you when you see that perfect creamy texture!
How to Make Vampire Bite Cheesecake
Okay, let’s get to the fun part! Making this vampire bite cheesecake is easier than you might think, but there are a few tricks I’ve learned over the years to make it absolutely perfect. Follow these steps, and you’ll have a spooky showstopper that’ll impress even the pickiest little monsters at your Halloween party.
Preparing the Crust
First things first – preheat your oven to 325°F (165°C). I always do this before anything else because cheesecakes are all about temperature control. Grab your 9-inch springform pan (the removable sides are a lifesaver!) and let’s make that buttery crust.
Mix your graham cracker crumbs with melted butter until it looks like wet sand. Here’s my secret: I press the mixture into the pan using the bottom of a measuring cup – it gives you perfect, even pressure. Really work it up the sides about an inch to create a nice little well for all that creamy filling. Pop it in the oven for 8 minutes – just until it’s lightly golden and smells like heaven. This quick bake helps prevent a soggy bottom!
Making the Cheesecake Filling
Now for the good stuff! In your stand mixer (or with a hand mixer if you’re feeling old-school), beat the cream cheese until it’s completely smooth – about 2 minutes. Scrape down those sides and the bottom of the bowl – I can’t tell you how many lumps I’ve had from missing this step!
Add the sugar and vanilla, beating another minute until fluffy. Crack in those room-temperature eggs one at a time, mixing just until combined after each. Overmixing here can lead to cracks later – been there, done that! Finally, gently fold in the sour cream with a spatula. Your batter should be silky smooth with no streaks.
Creating the Vampire Bite Effect
Pour that gorgeous filling into your prepared crust. Now the magic happens! Dot the surface with drops of red gel food coloring – I use about 8-10 drops scattered randomly. Take a toothpick and gently swirl through the drops to create that eerie bloodstain effect. Not too much though – you want distinct swirls, not a pink mess!
Bake for 50-55 minutes until the edges are set but the center still jiggles slightly when nudged. Let it cool completely in the oven with the door cracked open (this prevents cracks better than anything I’ve tried). Chill for at least 4 hours – patience is key!
Right before serving, warm your jam slightly and drizzle artfully over one side to look like fresh vampire bites. Use a spoon to create little drips down the sides for extra drama. Now take a bow – you’ve just created the spookiest, creamiest cheesecake on the block!
Tips for the Perfect Vampire Bite Cheesecake
After making this cheesecake more times than I can count (and learning from all my mistakes!), here are my can’t-live-without tips for vampire bite perfection:
- Say no to cracks: That water bath trick everyone raves about? Skip it! Just bake at 325°F and cool slowly in the oven with the door cracked – works like magic every time.
- Chill out: I know it’s tempting, but don’t rush the chilling. Four hours minimum in the fridge sets the texture perfectly for clean slices.
- Knife game strong: Wipe your knife with a hot, damp cloth between cuts for picture-perfect slices that show off those creepy swirls.
- Jam timing: Only add the “blood” drizzle right before serving to keep it looking fresh and dramatic.
- Swirl smarts: Less is more with the food coloring – two quick figure-eights with the toothpick gives the best vampire bite effect.
Vampire Bite Cheesecake Variations
Once you’ve mastered the classic version, it’s fun to play with different flavors for this spooky dessert! My favorite twist is using chocolate graham crackers for the crust – it gives that classic “dirt” look with extra richness. For real drama, try adding black cocoa powder to your filling (about ¼ cup) for an eerie gray cheesecake that still tastes amazing. If you’re feeling adventurous, swap the strawberry jam for cherry pie filling – the thicker texture makes perfect “clotted blood” drips. And for my fellow pumpkin lovers, mixing in ½ cup of pumpkin puree with the spices creates a delicious Halloween hybrid!
Storing and Serving Vampire Bite Cheesecake
Here’s the scoop on keeping your vampire bite cheesecake fresh and fabulous! Once chilled, cover it tightly with plastic wrap or store in an airtight container in the fridge. It’ll stay perfect for up to 5 days (if it lasts that long!). For longer storage, you can freeze it without the jam topping for about a month – just thaw overnight in the fridge when ready to serve. When it’s showtime, gently warm your jam for 10-15 seconds in the microwave to get that perfect “blood” drizzle consistency. Pro tip: Slice with a hot knife to keep those vampire bite edges looking sharp and clean!
Vampire Bite Cheesecake Nutrition Information
Now, I’m no nutritionist (I’m more of a “seconds, please!” kind of baker), but here’s the scoop on what’s in each deliciously spooky slice. Keep in mind these are estimates – actual values can vary depending on your exact ingredients and portion sizes:
- Serving Size: 1 slice (about 1/12 of the cheesecake)
- Calories: 420
- Sugar: 32g
- Sodium: 320mg
- Fat: 28g
- Protein: 6g
Remember friends – it’s Halloween! A little indulgence never hurt anybody, especially when it’s this fun to eat.
Frequently Asked Questions
Can I freeze this cheesecake?
Absolutely! Just hold off on the jam topping first. Wrap the chilled cheesecake tightly in plastic wrap, then foil, and freeze for up to a month. When you’re ready to serve, thaw overnight in the fridge and add fresh “blood” drizzle right before your Halloween party starts. I’ve kept slices individually wrapped in my freezer for emergency dessert cravings!
How to fix cracked cheesecake?
Oh honey, we’ve all been there! Here’s my lifesaver trick – those cracks become “vampire claw marks” when covered with extra jam. Just warm a bit more jelly and artfully fill the cracks – no one will ever know! For prevention, remember my cooling tip: leave it in the turned-off oven with the door cracked for an hour after baking.
Substitute for graham crackers?
No graham crackers? No problem! Digestive biscuits work beautifully (they’re my British cousin’s favorite). For gluten-free, try gluten-free vanilla wafers or even crushed Oreos if you want a chocolate twist. The crust ratio stays the same – just mix your crumbs with melted butter until they hold together when pressed.
24-Hour Vampire Bite Cheesecake That Haunts Taste Buds

A spooky and delicious cheesecake shaped like a vampire bite, perfect for Halloween.
- Prep Time: 20 minutes
- Cook Time: 55 minutes
- Total Time: 5 hours 15 minutes
- Yield: 12 servings 1x
- Category: Dessert
- Method: Baked
- Cuisine: American
- Diet: Vegetarian
Ingredients
- 2 cups graham cracker crumbs
- 1/2 cup melted butter
- 24 oz cream cheese, softened
- 1 cup granulated sugar
- 1 tsp vanilla extract
- 3 large eggs
- 1/2 cup sour cream
- Red food coloring
- 1/2 cup strawberry or raspberry jam
Instructions
- Preheat oven to 325°F (165°C).
- Mix graham cracker crumbs and melted butter, press into a springform pan.
- Beat cream cheese, sugar, and vanilla until smooth.
- Add eggs one at a time, mixing after each.
- Stir in sour cream.
- Pour filling over crust.
- Drop small amounts of red food coloring onto the surface, swirl lightly.
- Bake for 50-55 minutes until set.
- Cool completely, then refrigerate for 4 hours.
- Warm jam slightly and drizzle over cheesecake to resemble blood.
Notes
- Use a toothpick to swirl the red coloring for a realistic effect.
- Chill thoroughly before slicing.
- Store leftovers covered in the fridge.
Nutrition
- Serving Size: 1 slice
- Calories: 420
- Sugar: 32g
- Sodium: 320mg
- Fat: 28g
- Saturated Fat: 16g
- Unsaturated Fat: 9g
- Trans Fat: 0g
- Carbohydrates: 38g
- Fiber: 1g
- Protein: 6g
- Cholesterol: 125mg