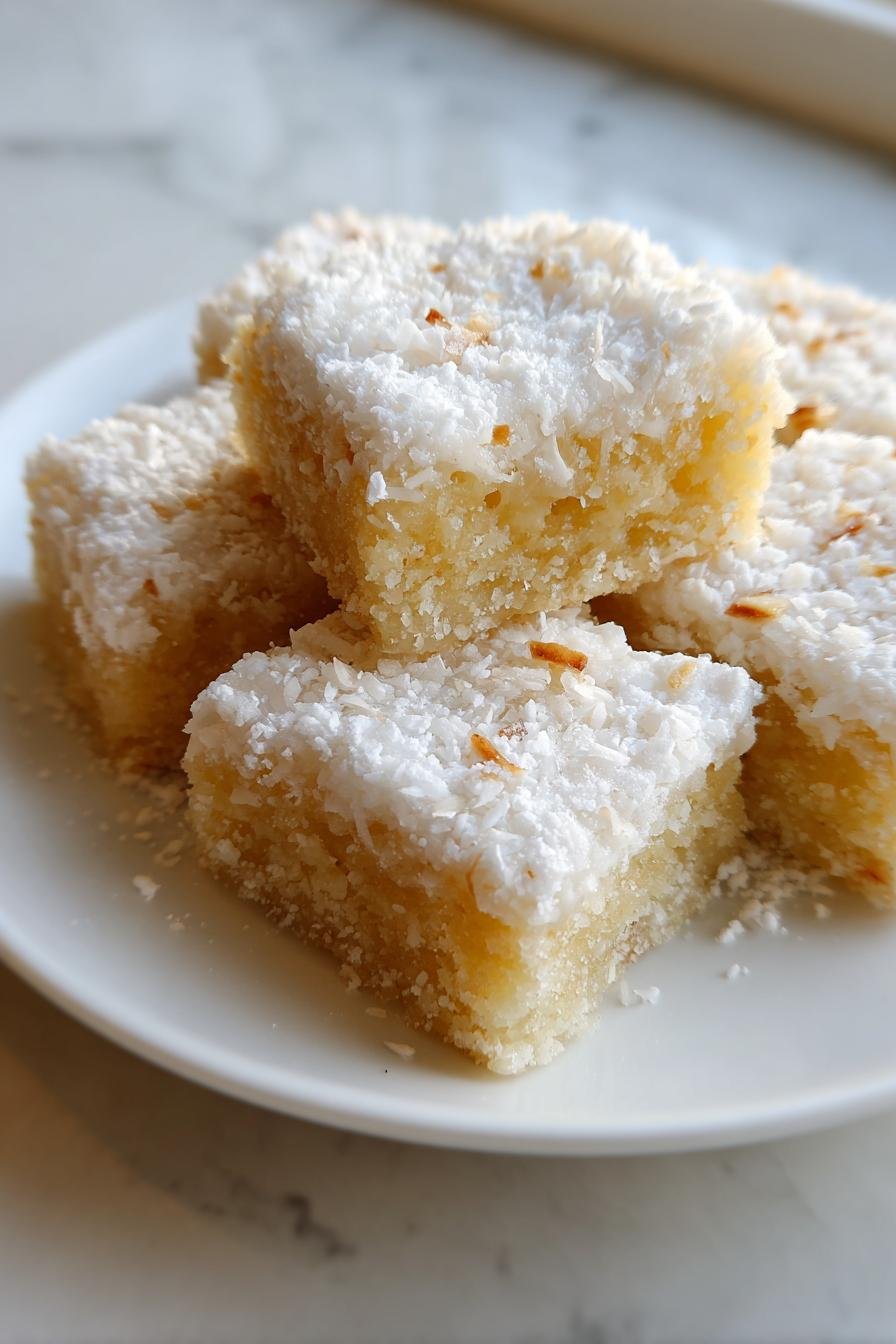
Holiday Coconut Snow Bars: Indulge in Irresistible Bliss!
Introduction to Holiday Coconut Snow Bars
As the holiday season approaches, I find myself searching for sweet treats that bring joy without taking hours to prepare. That’s where these delightful holiday coconut snow bars come in! They’re not just a quick solution for busy days; they’re a festive indulgence that will impress your loved ones. With their rich coconut flavor and a hint of chocolate, these bars are perfect for gatherings or cozy nights at home. Trust me, once you try them, you’ll want to make them a holiday tradition!
Why You’ll Love This Holiday Coconut Snow Bars
These holiday coconut snow bars are a dream come true for busy moms and professionals alike. They come together in just 15 minutes, making them a breeze to whip up. The combination of sweet coconut and rich chocolate creates a flavor explosion that will have everyone asking for seconds. Plus, they’re perfect for sharing at holiday parties or enjoying with a warm cup of cocoa. Who wouldn’t love that?
Ingredients for Holiday Coconut Snow Bars
Gathering the right ingredients is the first step to creating these delightful holiday coconut snow bars. Here’s what you’ll need:
- Shredded Coconut: This is the star of the show! It adds a chewy texture and tropical flavor. You can use sweetened or unsweetened, depending on your taste preference.
- Sweetened Condensed Milk: This creamy ingredient binds everything together and adds sweetness. It’s a must for that rich, indulgent taste.
- Unsweetened Cocoa Powder: For a touch of chocolatey goodness, cocoa powder brings depth to the bars. It balances the sweetness of the coconut beautifully.
- Butter: Melted butter adds richness and helps the bars hold their shape. You can substitute with coconut oil for a dairy-free option.
- Vanilla Extract: A splash of vanilla enhances the overall flavor, making these bars even more irresistible.
- Salt: Just a pinch of salt elevates the sweetness and rounds out the flavors perfectly.
For those who want to get creative, consider adding nuts or dried fruits for extra texture and flavor. You can find the exact quantities for each ingredient at the bottom of the article, ready for printing!
How to Make Holiday Coconut Snow Bars
Making holiday coconut snow bars is a delightful experience that fills your kitchen with sweet aromas. Follow these simple steps to create your own batch of blissful treats!
Step 1: Preheat the Oven
First things first, preheat your oven to 350°F (175°C). Preheating is crucial because it ensures even baking. If you skip this step, your bars might not cook properly, leading to a gooey mess instead of a delicious treat. Trust me, a well-preheated oven is your best friend in baking!
Step 2: Mix the Ingredients
In a mixing bowl, combine the shredded coconut, sweetened condensed milk, cocoa powder, melted butter, vanilla extract, and salt. Use a spatula or wooden spoon to mix everything together until it’s well combined. You want a thick, sticky mixture that holds together. This is where the magic begins, so don’t rush it!
Step 3: Prepare the Baking Dish
Next, grab a baking dish and grease it well with butter or cooking spray. This step is essential to prevent the bars from sticking. You can also line the dish with parchment paper for easy removal later. Just make sure to leave some overhang, which will help you lift the bars out once they’re cool.
Step 4: Spread and Bake
Now, spread the coconut mixture evenly in the prepared baking dish. Use the back of your spatula to press it down firmly. This helps the bars hold their shape. Bake in the preheated oven for 25-30 minutes, or until the edges are golden brown. Keep an eye on them; you want that perfect texture!
Step 5: Cool and Cut
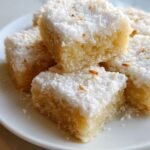
Once baked, remove the dish from the oven and let it cool completely. This is a crucial step! If you cut the bars while they’re warm, they’ll crumble and fall apart. Patience is key here. Once cooled, use a sharp knife to cut them into squares or rectangles. Enjoy the beautiful sight of your holiday coconut snow bars!
Tips for Success
- Use fresh shredded coconut for the best flavor and texture.
- Don’t skip the cooling step; it’s vital for clean cuts.
- For a fun twist, add chocolate chips or nuts to the mixture.
- Store leftover bars in an airtight container to keep them fresh.
- Feel free to experiment with different extracts, like almond or coconut, for unique flavors.
Equipment Needed
- Baking dish: A 9×9 inch dish works perfectly, but any similar size will do.
- Mixing bowl: A large bowl is ideal, but you can use any bowl you have on hand.
- Spatula: A rubber or wooden spatula helps mix and spread the ingredients.
- Measuring cups: Essential for accurate ingredient portions.
- Sharp knife: For cutting the bars into neat squares.
Variations of Holiday Coconut Snow Bars
- Nutty Delight: Add chopped walnuts or almonds for a crunchy texture that complements the chewy coconut.
- Fruit Fusion: Mix in dried cranberries or chopped apricots for a burst of fruity flavor and a pop of color.
- Chocolate Lovers: Swirl in some chocolate chips or drizzle melted chocolate on top for an extra indulgent treat.
- Gluten-Free Option: Ensure your cocoa powder and any added ingredients are certified gluten-free for a safe treat.
- Vegan Version: Substitute the butter with coconut oil and use a plant-based sweetened condensed milk alternative.
Serving Suggestions for Holiday Coconut Snow Bars
- Pair these bars with a warm cup of cocoa or a festive spiced tea for a cozy treat.
- Serve alongside a scoop of vanilla ice cream for a delightful contrast in temperature and texture.
- For a beautiful presentation, dust the bars with powdered sugar or drizzle with melted chocolate.
- Arrange on a decorative platter with fresh berries for a pop of color.
- Wrap individual bars in festive cellophane for a charming homemade gift.
FAQs about Holiday Coconut Snow Bars
Can I use unsweetened coconut for these bars?
Absolutely! Unsweetened coconut works well, but keep in mind that the bars will be less sweet. If you prefer a sweeter treat, consider adding a bit more sweetened condensed milk.
How should I store leftover holiday coconut snow bars?
Store your bars in an airtight container at room temperature for up to a week. If you want to keep them longer, they freeze beautifully! Just wrap them tightly in plastic wrap before placing them in a freezer-safe container.
Can I make these bars ahead of time?
Yes! These holiday coconut snow bars are perfect for making ahead. Bake them a day or two in advance, and they’ll be ready to impress your guests when the time comes.
What can I serve with holiday coconut snow bars?
These bars pair wonderfully with a warm cup of cocoa or a festive spiced tea. You can also serve them with a scoop of vanilla ice cream for a delightful contrast!
Are holiday coconut snow bars suitable for a gluten-free diet?
Yes, they can be gluten-free! Just ensure that your cocoa powder and any additional ingredients are certified gluten-free. Enjoy without worry!
Final Thoughts
Creating these holiday coconut snow bars is more than just baking; it’s about sharing joy and warmth with those you love. The delightful combination of coconut and chocolate brings smiles to faces, making every bite a little piece of happiness. Whether you’re enjoying them at a festive gathering or savoring a quiet moment with a cup of tea, these bars are sure to become a cherished tradition in your home. So, roll up your sleeves, gather your ingredients, and let the magic of the holidays fill your kitchen with sweet aromas and joyful memories!
PrintHoliday Coconut Snow Bars: Indulge in Irresistible Bliss!
Delicious and festive coconut snow bars perfect for holiday celebrations.
- Prep Time: 15 minutes
- Cook Time: 30 minutes
- Total Time: 45 minutes
- Yield: 16 bars 1x
- Category: Dessert
- Method: Baking
- Cuisine: American
- Diet: Vegetarian
Ingredients
- 2 cups shredded coconut
- 1 cup sweetened condensed milk
- 1/2 cup unsweetened cocoa powder
- 1/4 cup butter, melted
- 1 teaspoon vanilla extract
- 1/4 teaspoon salt
Instructions
- Preheat the oven to 350°F (175°C).
- In a mixing bowl, combine shredded coconut, sweetened condensed milk, cocoa powder, melted butter, vanilla extract, and salt.
- Mix until well combined.
- Spread the mixture evenly in a greased baking dish.
- Bake for 25-30 minutes or until the edges are golden brown.
- Allow to cool completely before cutting into bars.
Notes
- For a sweeter taste, use sweetened shredded coconut.
- Store in an airtight container for up to a week.
- These bars can be frozen for longer storage.
Nutrition
- Serving Size: 1 bar
- Calories: 150
- Sugar: 10g
- Sodium: 50mg
- Fat: 7g
- Saturated Fat: 4g
- Unsaturated Fat: 2g
- Trans Fat: 0g
- Carbohydrates: 20g
- Fiber: 2g
- Protein: 2g
- Cholesterol: 15mg